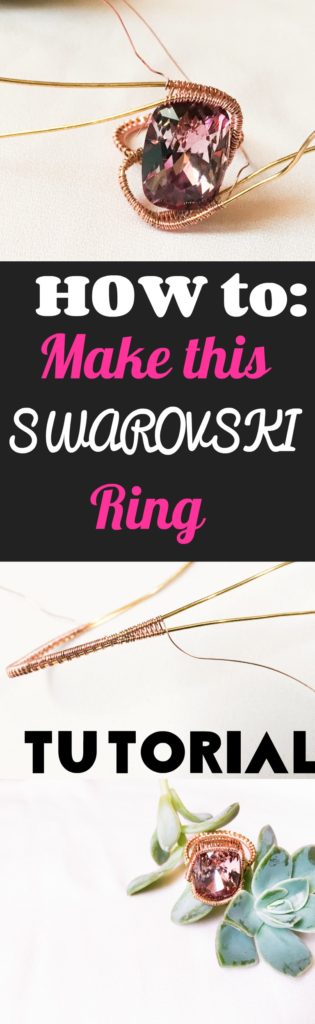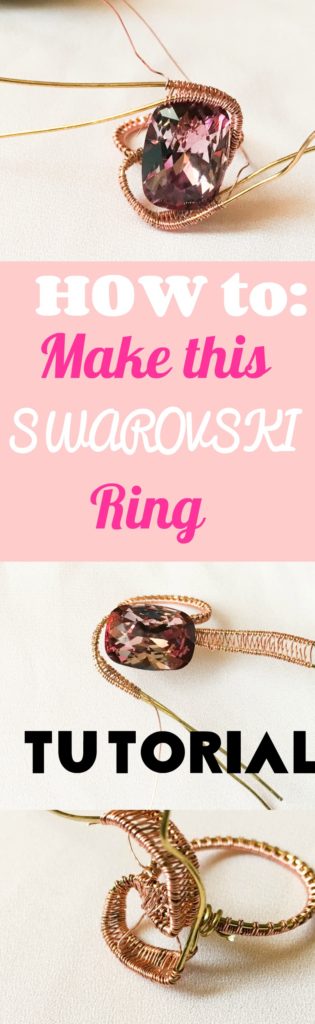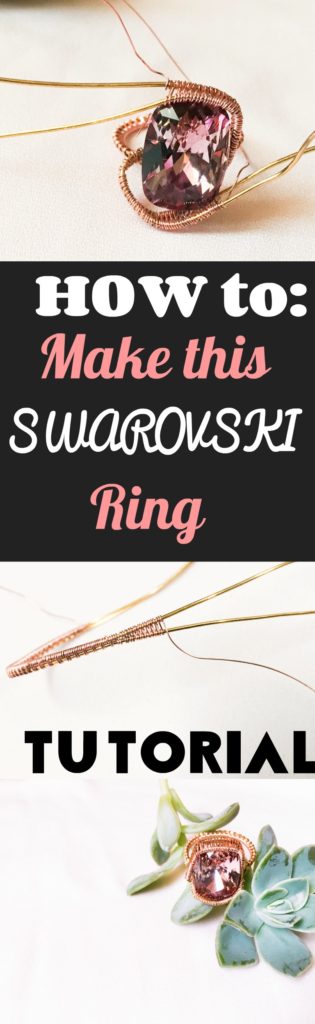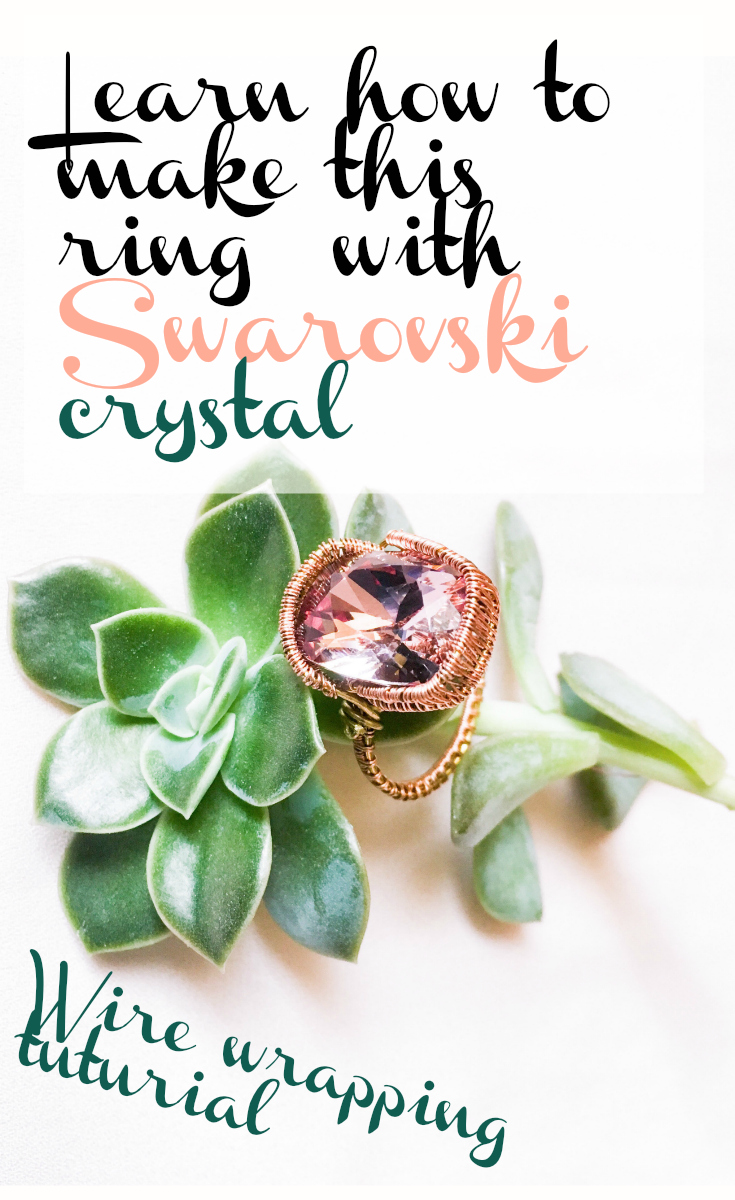
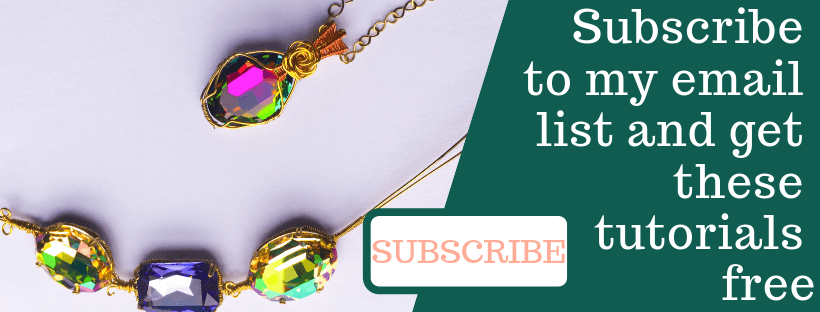
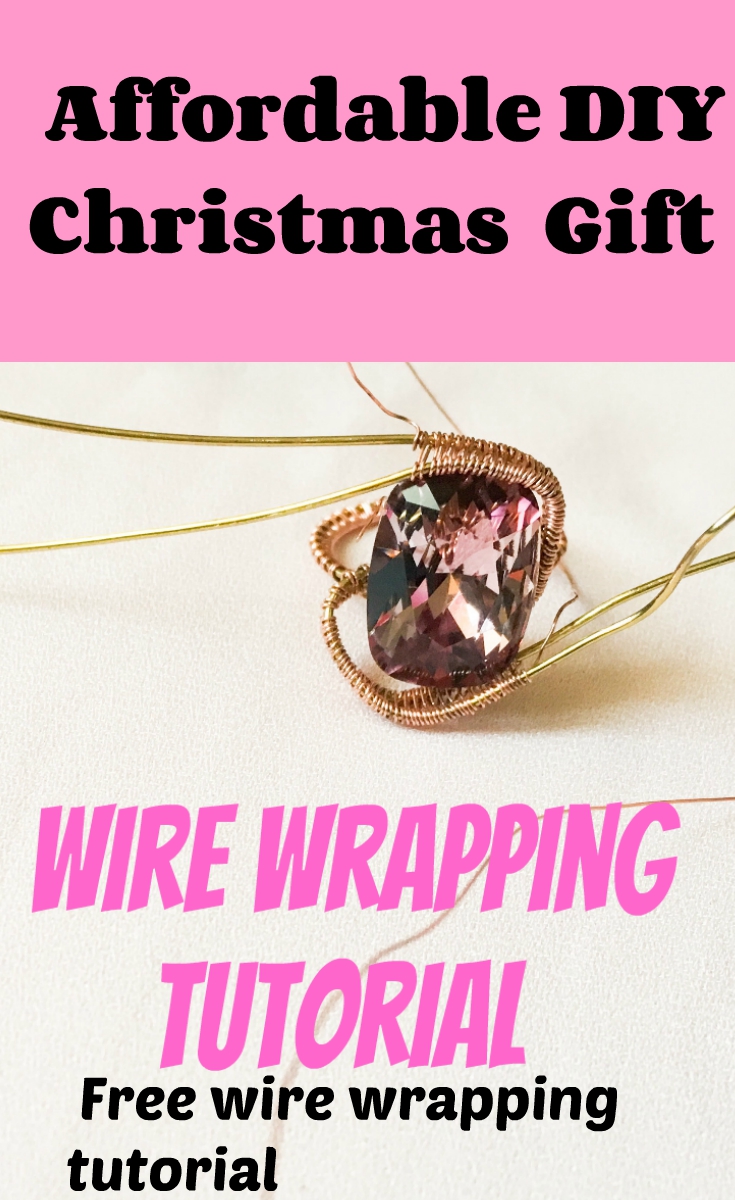
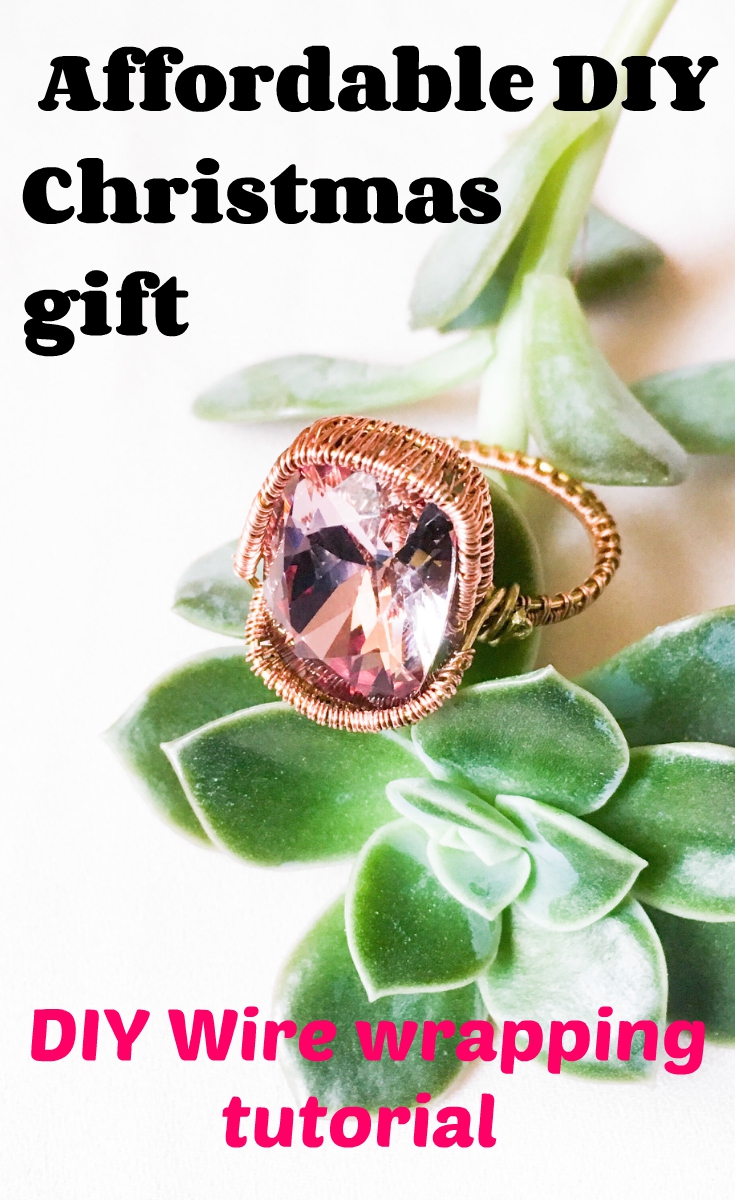
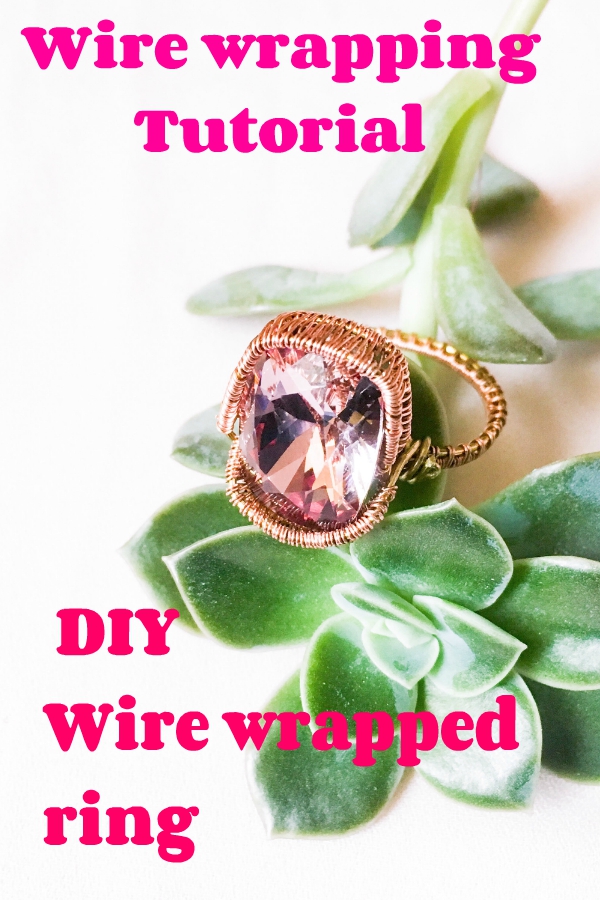
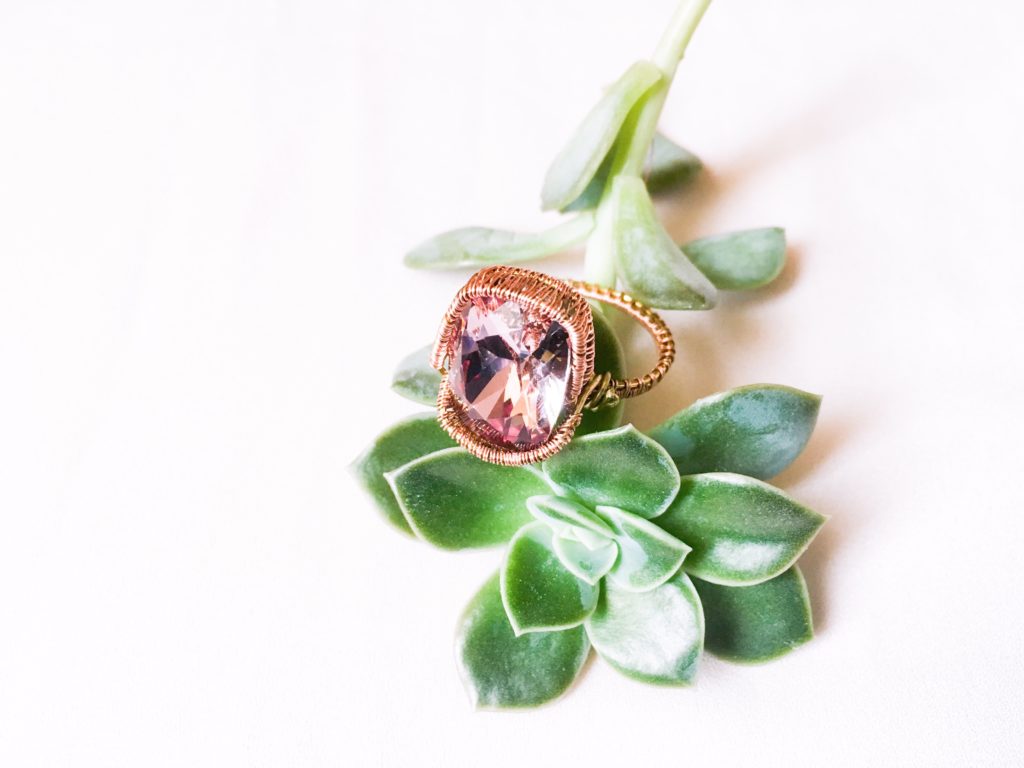
Good day to you all! I’m back with another ring tutorial, this time it will not be a prong set or a rose ring but a weave set (I do not know if this is the right description but I’m using it) ring. This ring will be made using a cushion cut Swarovski stone in antique pink. I love this stone and out of all Swarovski fancy stones, it looks the most gem like to me. You can use any type of stone to make this ring (cabochons, irregular cut stones even pretty rocks) just adjust your placement to make it work.

Materials needed:


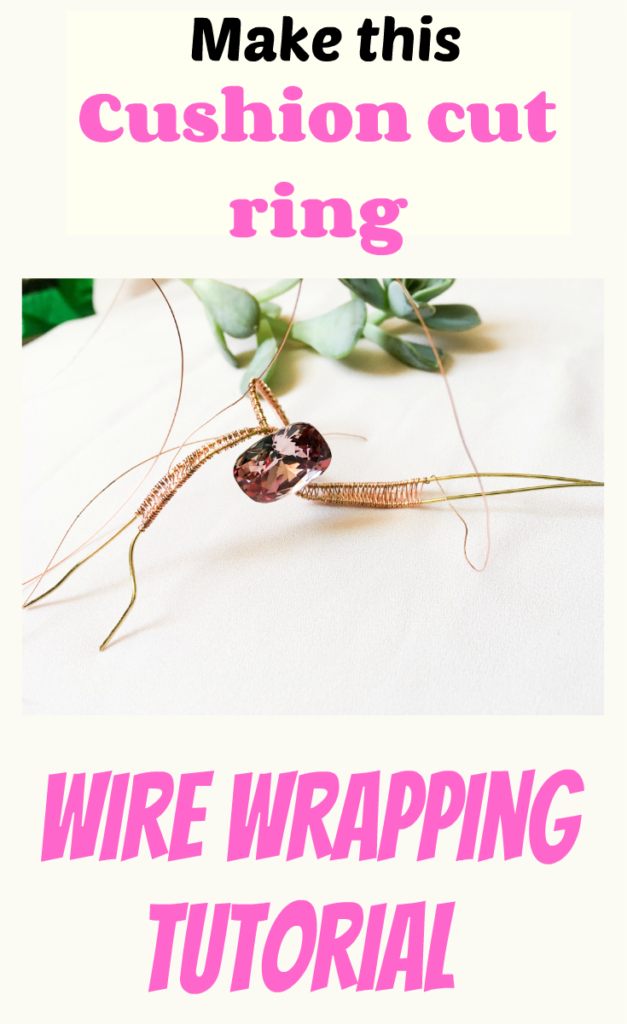

Swarovski cushion cut stone
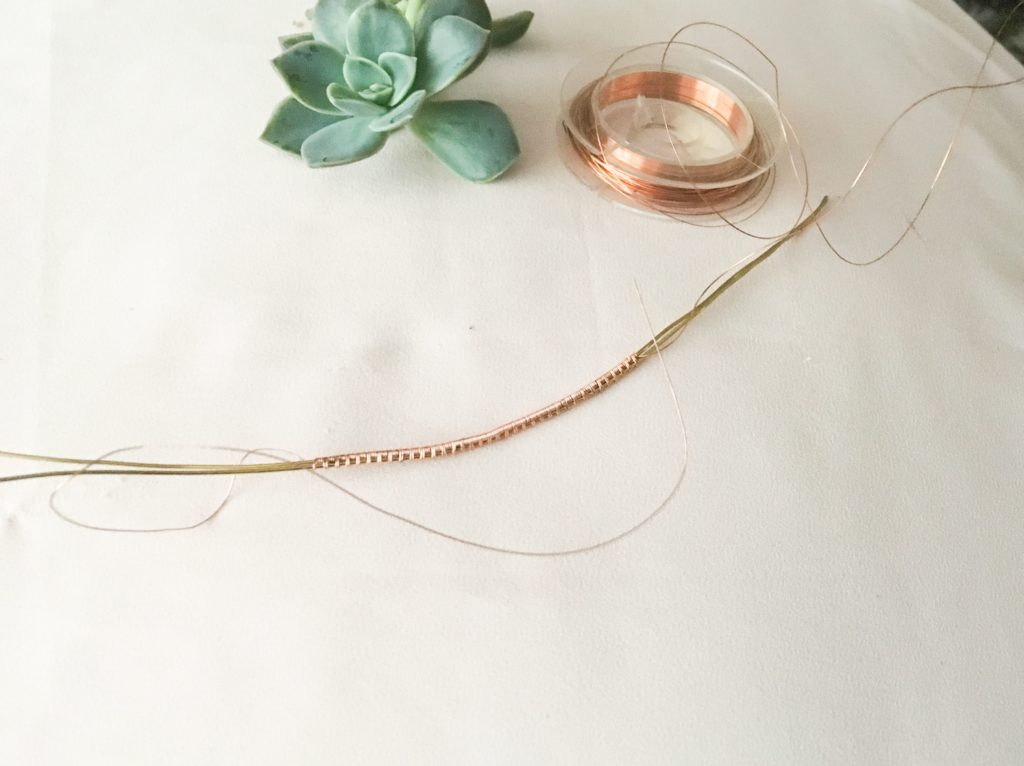
Base wire: 2x 20cm 20 gauge (0.8mm or even 1mm) wire (make it longer if you plan to add detail)
Weaving wire: 24 gauge wire (leave on spool if you can)
Ring mandrel (optional)
Measuring tape (or a string and a ruler) (optional if you do not have a ring mandrel)
Method
Step one: Measuring the ring size
Measure your ring size by taking the measuring tape and wrapping it around your finger or by wrapping the string around your finger and using the ruler. Take your two base wires and make a mark in the middle. Divide the ring measurement by half, take your ruler and mark this distance from the middle dot you just made. Do this on both sides. You should have three marks
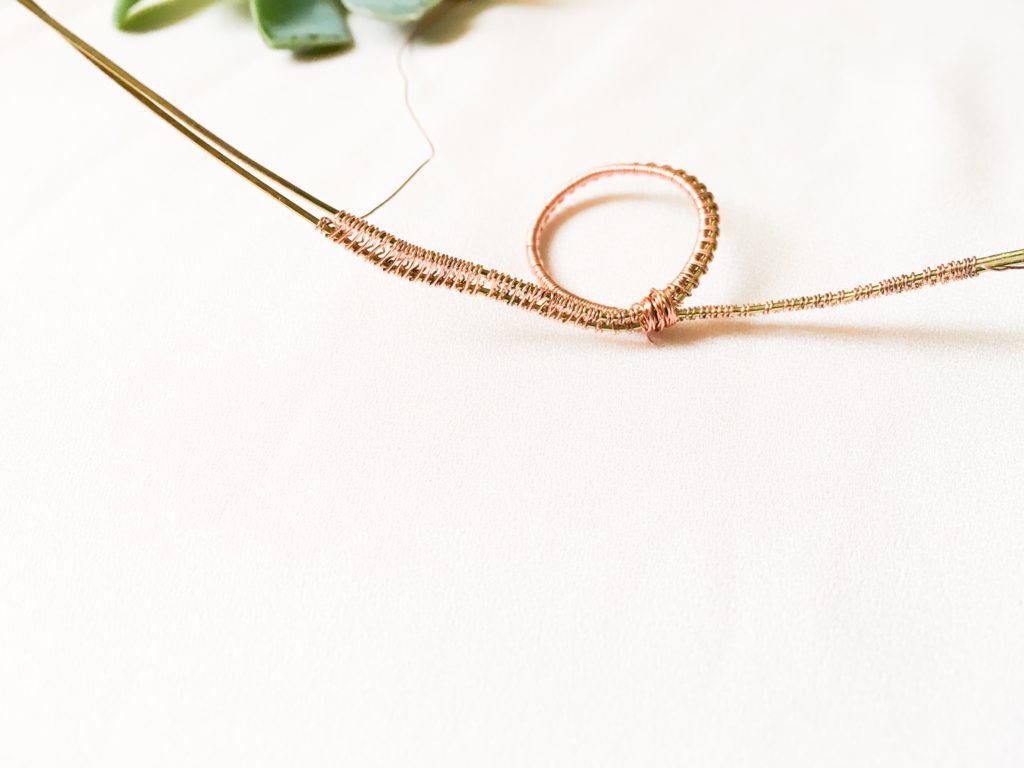
Step two: Making the ring band.
Take your 20 gauge wire pieces and holding them flush to together. Starting at first mark (the one on the far left) weave using your preferred pattern for two base wires, you can find the patterns here. Carry on until you reach the third mark, then keep weaving for about 4 to 6 more mm. If you have a ring mandrel just go a couple of centimetres over your size.
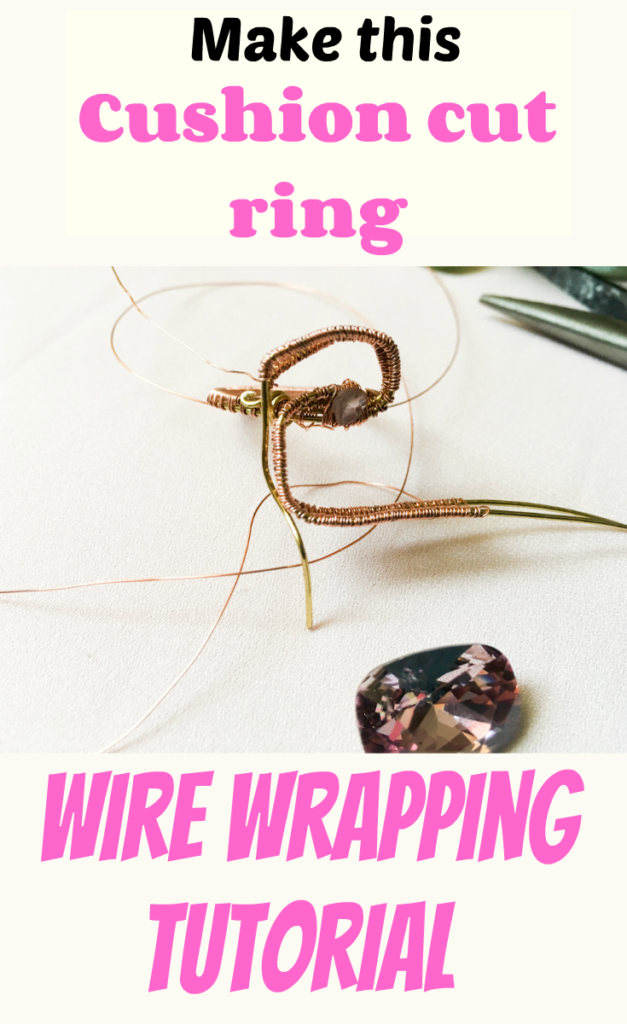
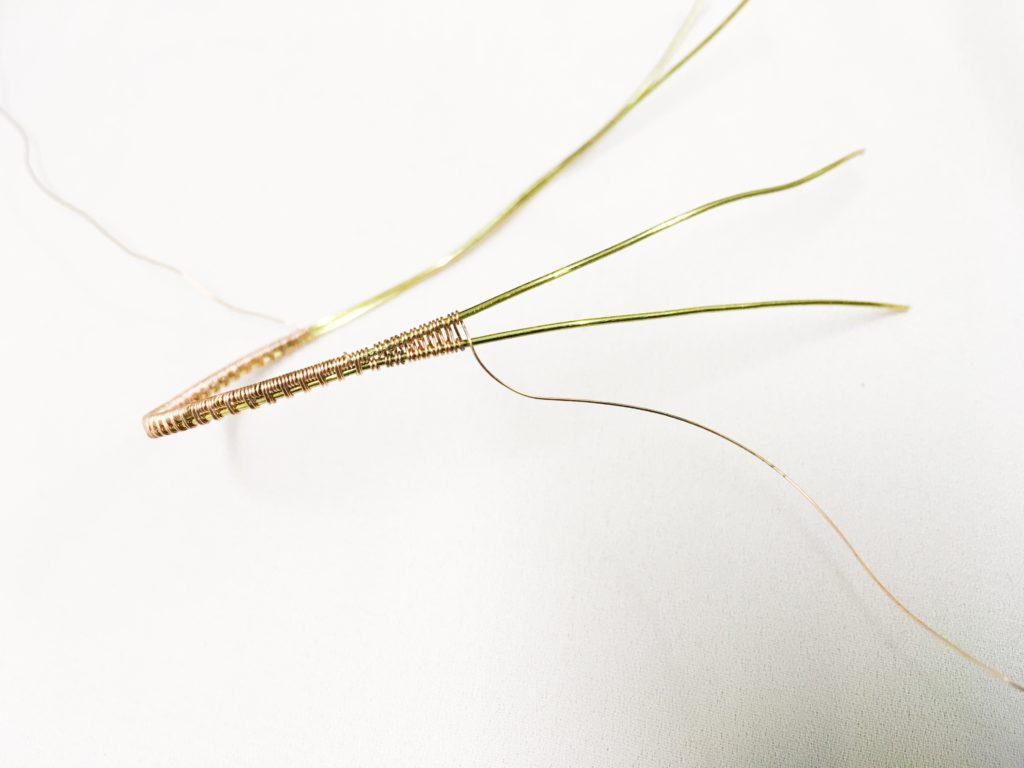
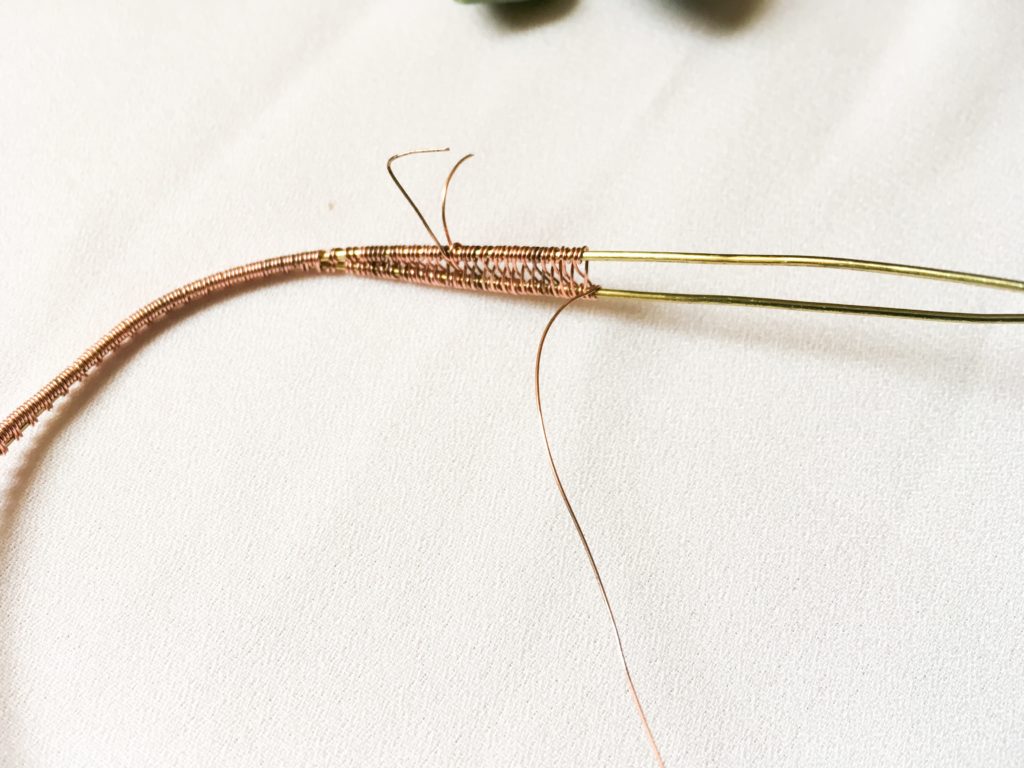
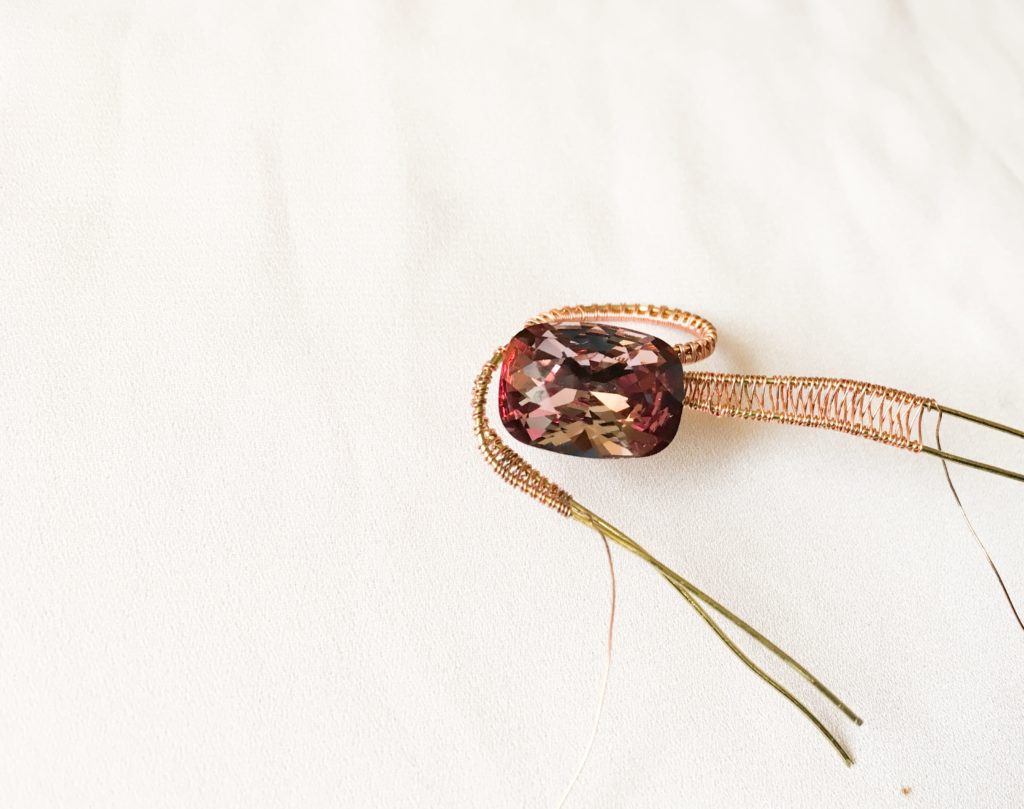
Step three: Making the setting
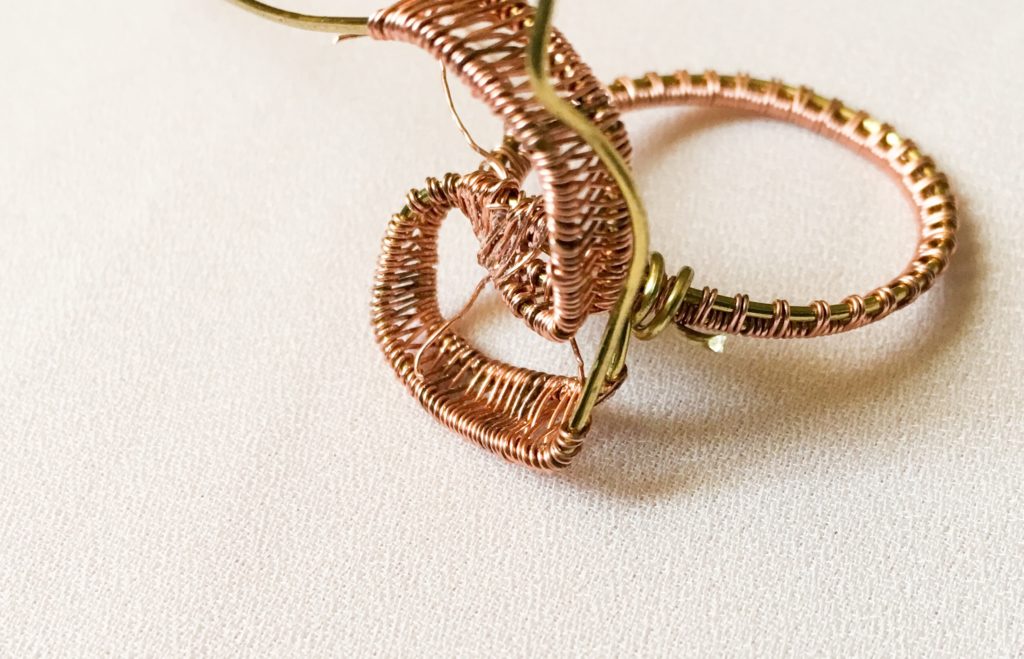
Separate your base wires where the band ends. They should be making a narrow (or wide) v-shape that should be wide enough to hold your stone. Start making an 8-figure weave on both sides. Make it long enough to hold your stone in place.
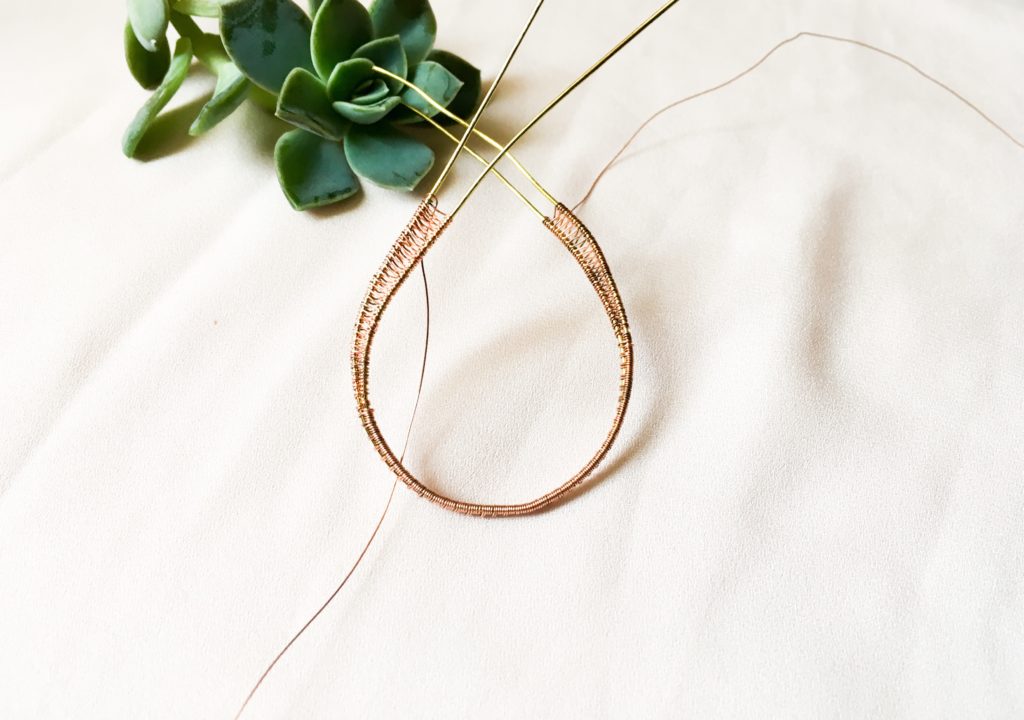
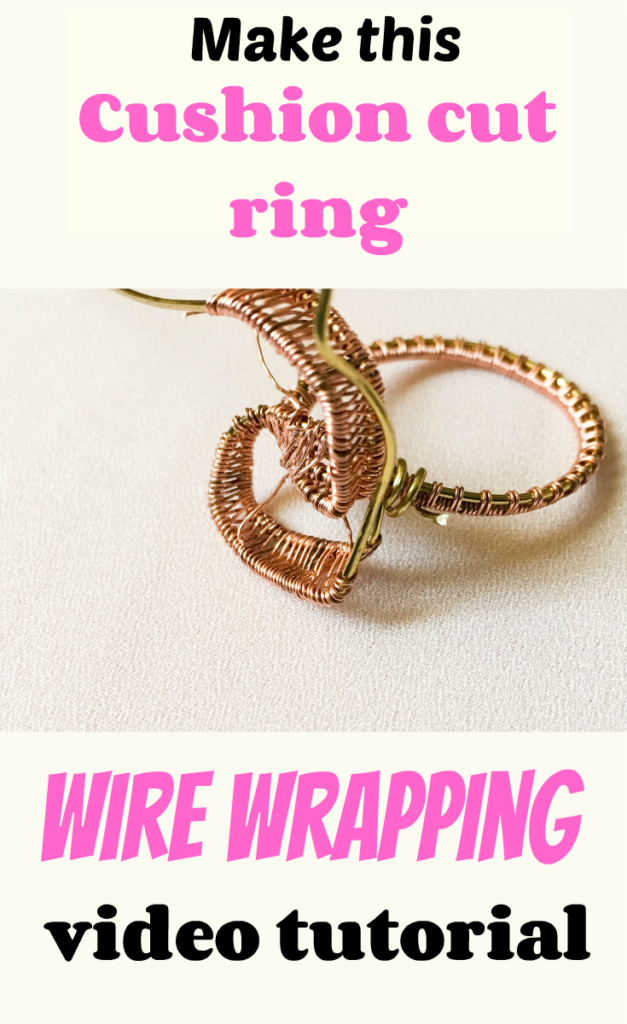
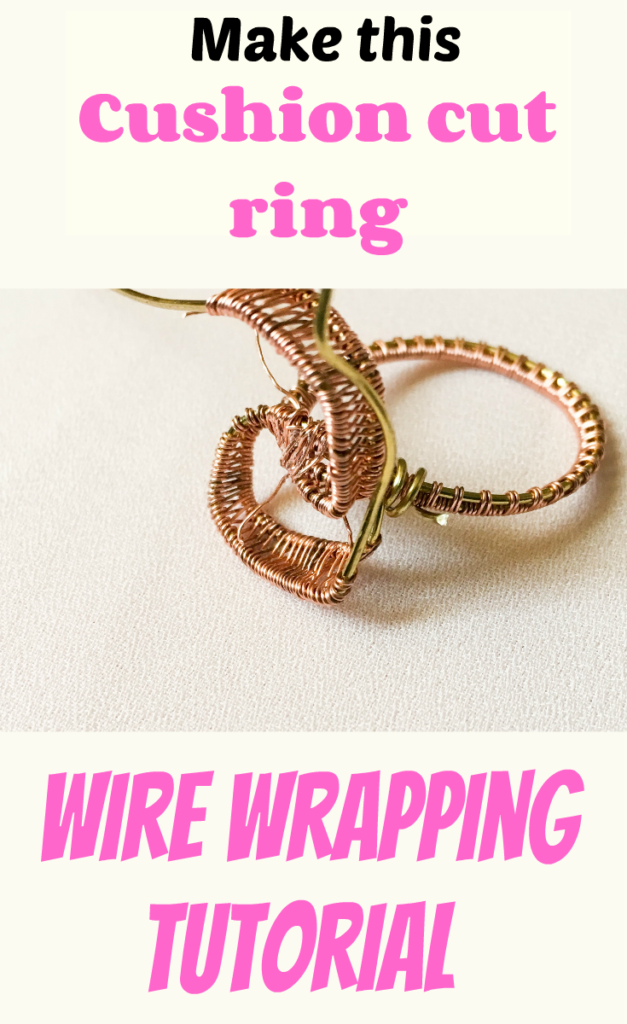
Shape you ring band. When it is to your liking, cross the two ends together and just wrap your weaving wire around it (this is why you had to add the extra 6mm of ring band). I did not weave it together because I wanted to easily adjust it if necessary.
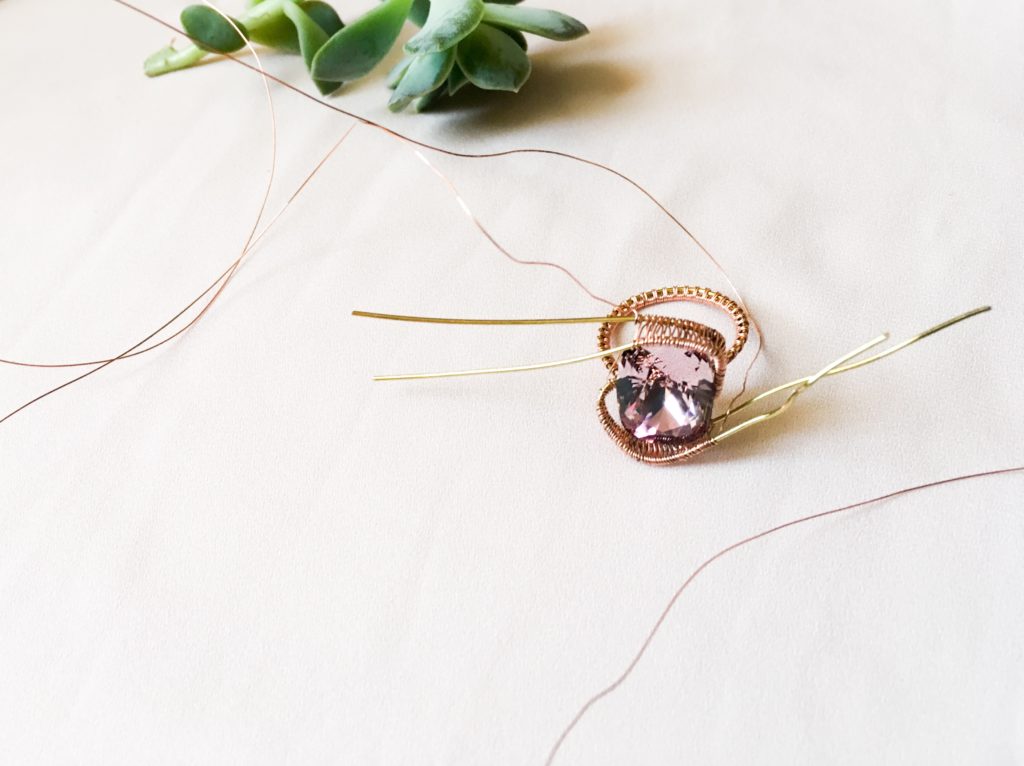
Use sticky tack (the putty that is used to stick posters onto walls) to hold your stone in place in the middle. If you are using a pointed stone (as I am) I would strongly recommend the tack as it will protect the stone from damage while you press it against the band.
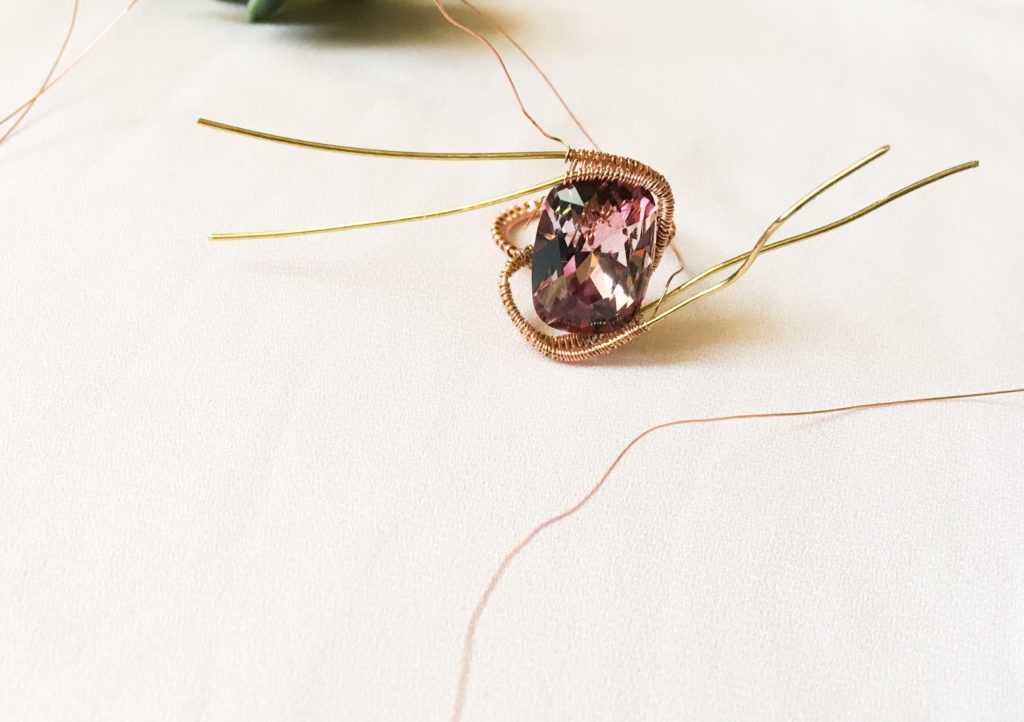
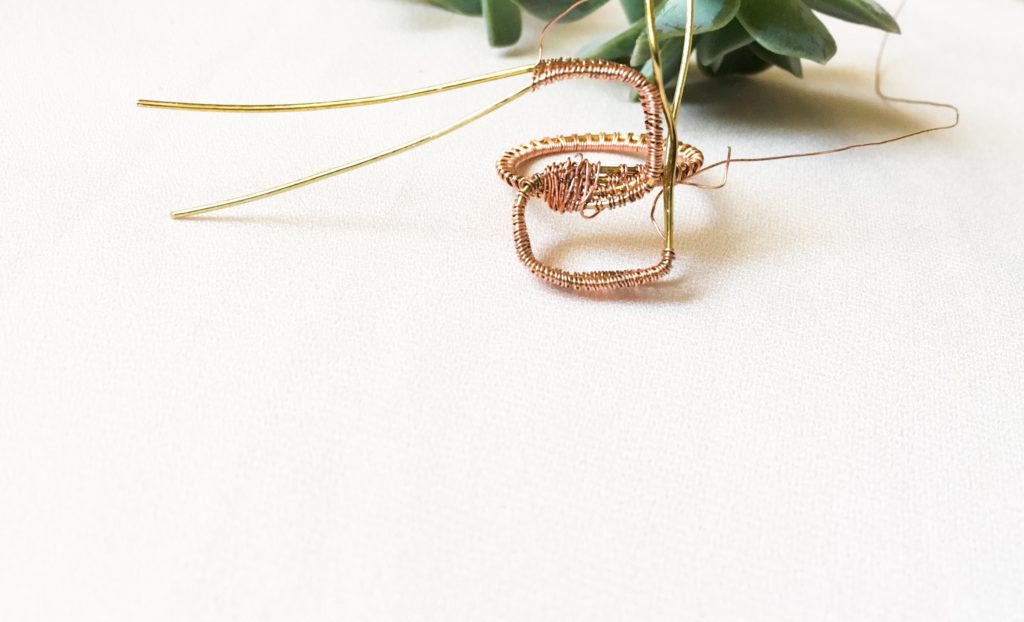
Shape your weaved wire around the cushion cut stone. There should be four tails of wire left where your weaves end. Choose one side, take the tail closest to the band and holding the stone and the shape of the setting in place, coil the tail around the ring band. Turn the ring to the other side and do the same. Do a final fit check, make sure that the shape is correct and that the stone can be set securely. Take the third tail and wrap it around the first, turn the ring over and do the same to the other side. If the stone is a bit loose, use your pliers to bend the wire around the ring to hold it more securely.


Mandisa is a participant in the Amazon Services LLC Associates Program, an affiliate advertising program designed to provide a means for sites to earn advertising fees by advertising and linking to Amazon.com.